Monday, September 9, 2013

Glitzy Cowgirl Party

Hey guys!  Long time, no see!  Sorry I've been away for so long!  Just a little info.  I've decided to only use this blog to post about parties and DIY party stuff.  No more crafts, organization or anything else.  Have no fear though!  If you're into all that stuff and still want to see what I've been up to, you're in luck!  I've started a new blog just for that!  While I haven't posted my first project yet, I have several in the works.  I hope you'll come over and check it out!  Here's the link~ A Lazy Girl's Guide to Everything ~  Check out the All About Me page while you're there to learn more and don't forget to follow me on Facebook please!

Now, on to the really interesting stuff.  Today I'm showing you a party that I absolutely can not take all the credit for.  My friend Andrea asked me to help with the planning and styling of her little Lanie's 6th birthday party.  The theme?  I'm calling it Glitzy Cowgirl.  Andrea wanted a cowgirl theme, with just a bit of a twist.  Lanie had a pair of boots that started out as the jumping off point~ leopard print and pink.  However, two days before the party Andrea decided that she was having too much trouble finding anything to go with that theme and so instead of brown and pink and leopard print, a new color scheme was born.  Pink and black with lots of pattern and a little glitter thrown in for good measure.  Let me tell you, I fell in love with this color/pattern palette!  Also, I'm pretty sure I have a new addiction to glitter.  I spent one evening covering some little horses in mod podge and glitter and then I wanted to glitter everything in sight!  So cute!  Unfortunately, the wind was blowing really hard the day of the party and I only had my phone with me because I hadn't planned on taking pictures.  That means the few pictures I do have aren't very good, but hopefully you'll get the idea.
 
The Photo Booth!
 
Don't you just love the ribbon bow tied around the hay bale?!!  And Andrea made the bow on top using part of a plastic tablecloth!!!
 
Lanie already had this barn and the blanket in the background.  They fit the theme perfectly!
 
Aren't these cow print plates cute?!!  "Grub" included a "Make Your Own Trail Mix" bar.
 
A wagon was used as the "Waterin' Hole" and was later filled with ice and water bottles.
 
Yep, this "city girl" spent time helping move these hay bales to make the kids table.  The tops were covered with pieces of plastic tablecloths, but as you can see the wind didn't exactly cooperate. :-)
 
I threw together these frames at the last minute, but I think they may have been one of my favorite things!  I made napkin flowers and added sheriff badges to two of them.  The other two got the glitter horses I talked about earlier.  Don't you just love them?!!
 
When Andrea and I finished setting up, we looked around and I think we were both really impressed with how it turned out.  I really wish that the pictures did it justice.  Maybe someday I'll be able to afford a professional photographer! :-)
 
So, what do you think?  Is there a Glitzy Cowgirl in your life that would love this party?  Do you love glitter as much as I do?  :-)  Leave me some comment love and let me know your thoughts.  And don't forget to check out my new blog and follow me there and on Facebook!
Thanks everybody!

Saturday, July 27, 2013

Wedding Fever!!!

So here's the thing.  I now have "Wedding Fever" thanks to my friend Tonya.  She is a party planner in Alabama and she's been asked to plan a family member's wedding.  We've been talking about it and it has officially sent me to that crazy place I go when I get something in my head and can't let go of it.  Biggest problem I see with this?  No one has hired me (yet!) to plan their special day. :-(  Hmmm, how to fix this?  I'm working on it.  In the meantime, I asked the Handy Dandy Hubby if we could get remarried (after assuring him that I meant remarried to each other) he still said no. :-/  Wonder why he would have done that?  Could it be because we only got married 2 years ago?  Not exactly time to renew our vows.  Another reason might be that I tend to go a little crazy when planning weddings (I've planned several for family members).  I absolutely LOVE weddings.  Seriously, do you get that I LOVE them?  Ok, good. 
 
So here's what I'm thinking.  A lot of you probably don't follow me on Pinterest (shame on you) so I think I'm going to share some ideas that I've found on there with you guys over here on the blog.  How does that sound?  Good?  Great!
 
The first thing I want to share with you is this beautiful Coral Country Wedding board I have.  I've created it with the idea of mixing coral, mint and a gorgeous antique gold, but there are also lots of country aspects to this board that you could use with almost any color scheme.  Burlap and lace would go beautifully with the country elements as well.
 
Speaking of burlap and lace.  I am OBSESSED!!!  If my hubby ever decides to let me plan a vow renewal (not that he has much choice) this is what the theme will be.  Can you say gorgeous?!!?  Here is my Burlap and Lace board with some ideas on how you can incorporate these details into your special day.  I had to post a picture of this!  How gorgeous is this bouquet from Gypsy Farm Girl's Etsy shop?!  Be sure you check out her shop, she has some beautiful bouquets!
 
So, what do you think?  Do you have a wedding theme, color scheme, etc. that you would like to see inspiration for on the blog?  If so, leave me a comment and let me know.  I would LOVE to put together some ideas for you!  Not sure what you want?  Let's talk and I'll help you figure it out.  Hope you enjoyed this little peek into the Wedding Fever moment I'm having. Don't forget to check my Pinterest boards often as I am always updating them.  Have a wonderful weekend!
See ya next time!


Saturday, July 20, 2013

New blog series... I think

So, I'm trying out a new blog series.  Not sure if it's going to work out or not as I have a tendency to tire of things quickly, but we're going to give it a try.  Ok?  Ok.
This idea started when I saw the fabulous Miss Party Mom's new series, Five for Friday.  If you've never checked out her blog, you're missing out!  That chick is a riot!  She's blunt and to the point and I think she's awesome.  Go check her out!
 
Anyways, here's what I'm thinking.  Every week, probably on Saturday, I'm going to post six things that I'm digging right now or that I'm wanting to try out.  I'll have 6 different categories.  For the Home, Party Inspiration (of course), Recipes/Food (yes, this from the girl who doesn't cook, I'm broadening my horizons folks), Just Us Girls (something special just for me) and then, here's where it gets a little crazy.  I am going to have a category for teen girls and my daughter Wylee, is going to give her input.  I am also going to have a category for boys where my son Levi, will give his thoughts.
So, what do you think?  Are you ready to see some epic fails with the Recipe category?  Because, trust me, there will be some.  What do you think I should call this series?  I've been rolling around some names, but nothing makes me jump for joy.  A Few of My Favorite Things, Saturday Super Six, blah and blah.  Help!!!  If you have an awesome idea for a name, leave me a comment below!  Or, if you have a product, recipe, etc. you think I should check out, feel free to email me or comment with the name of it.  I'm planning on starting this series within the next couple of weeks, so let me know what you think!   


Saturday, June 29, 2013

Front Door Sign and Paper Napkin Flower Tutorial

Hey there girlies! How are you on this beautiful Saturday?!! I am feeling super creative today so I decided to make a little Fourth of July craft to share with you all. I have been wanting to make another wreath for a while now, but I wanted to make one with a twist... I wanted to use a picture frame. I have seen a few around Pinterest, but for some reason, the inspiration I needed never came to me. Until today. What I ended up with is less of a wreath and more of a sign, but it's going on my front door anyways.  :-)

I started out with a plain black picture frame, but I didn't want black, so I grabbed my handy dandy spray paint and painted it white.  The picture frame was missing the glass, so I decided to use some chalkboard paint and spray the cardboard backing with it.  I messed up a bit on the chalkboard paint, but I swear, once I seasoned it and wrote on it, you couldn't tell.  Anyways, Ta-Da!!!  Instant chalkboard.
I couldn't just leave it plain though!  Hmmm, what to do?  I had these little pinwheels that I bought for the Fourth of July so I pulled three of them off of their sticks and hot glued them to the corner of the frame.
 
Then, I decided I wanted a big red flower to go in the top corner of the frame.  I didn't have a red flower and I didn't have any red material or felt.  I had red paper napkins though!  I have never made a flower out of napkins, but there's a first time for everything, right?  Here's a little how-to on the paper napkin flower.
 
Start with a small napkin.  These are about 9x9.
Next, cut circles out of the napkin.  I just freehanded it .  You should get 4 circles out of each napkin.
Fold your circle in half and then in half again to make a triangle shaped petal.


Use one of your circles as the base for the flower and glue each petal to it.
Continue gluing petals onto your base until your flower is as full as you want it to be.  I think I used about 5 napkins for this flower and it's pretty full.
And there you have it!  A super simple flower made from paper napkins!  I love it!
 
Back to the frame.  Are you ready to see the finished sign?
There's a weird glare on this picture that I couldn't edit out, but you get the idea, right?  I'm thinking that I could easily pull off the little pinwheels and use this at different times of the year too.  Christmas maybe?
 
So, what do you think?  Are you going to be making a napkin flower any time soon?  I would love to see it if you do so leave me a link in the comments below.  And remember, I love hearing from my readers, it puts a big smile on my face! 
 
 P.S.  I added an "About Me" page.  If you haven't checked it out already, please do and let me know what you think.  You can find the tab for it at the top of the page.
 
Thanks for reading!  See you next time everybody!

Tuesday, June 25, 2013

Vintage Airplane/Travel Baby Shower

Hey there everybody! Thanks for stopping by today! I posted a couple of sneak peeks recently of a baby shower I had been working on and today is the day you get to see the whole shebang! Are you excited?!! I am!

Remember the Gender Reveal Party I did a while back for my sister?  This shower was for that same sister.  She and her husband picked out a nursery bedding set that had older airplanes and helicopters on it, so I got it in my head that I just had to do a vintage style airplane theme for the baby shower. 

It all started with the Boarding Pass Baby Shower Invitation I created. I absolutely adored the little biplane on the invite, but I had a really hard time finding anything like it when it came time to look for decorations.  That's when I decided that I would add travel to the theme instead of just airplanes.  I am mostly happy with how it turned out although there are a few things I wish I had done differently.  Then again, there always are. :-)

When guests first walked in the door, there was a table holding the "In Flight Activity".  I had bibs and fabric markers laid out so that guests could create a personalized bib for baby Judah.  For guests who didn't consider themselves artists, I had cookie cutters laid out so that they could trace designs onto the bibs.  I wish I had gotten some pictures of the finished bibs, but by the time I thought of it, they were already packed away with the mommy-to-be.

 
The tables were set with map place mats that I tore out of an atlas and cut down to size and cloud and globe centerpieces.  I also had little wooden airplanes resting on some of the clouds.  I added brown paper plates and mason jars with striped straws to finish it off. 


I decorated the dessert table with a combination of vintage suitcases, airplanes, globes and maps.  Remember the new paper that I aged?  I used it to make these map buntings! Sorry for the picture overload here!


The favors were "Complimentary Peanuts" that I put in these cute little treat bags.  I added custom labels that said "Frye Flights- In Flight Snack" (that's the last name of the parents to be).  These were a pretty big hit. :-)

 So, there you have it.  Sorry this post was so short on words and long on pictures.  Like I said, there are definitely things I wish I could have done differently.  I had grand plans for this party, but sometimes life gets in the way.  All in all, I think it turned out pretty well.  If you don't count all of the stuff I bought and ended up not using, I'd say I spent about $200 to $250 dollars including the cookies and brownies, but not including the rental fee for the building where we had the party.  Keep in mind, that amount covers supplies for 40 people.  What do you think?  What was your favorite part?  Leave me a comment and let me know!  See you next time!
 

Monday, June 17, 2013

Making New Paper Look Vintage

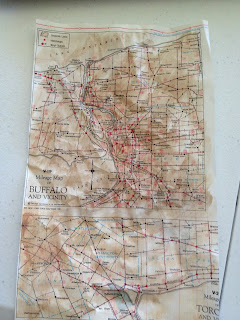
Hey everybody! How's it going?!! I'm so glad you decided to come visit me today! I have a little tale of trial and error for you today. Here's the deal, when I started planning the Vintage Airplane/Travel Baby Shower I knew that I wanted to use old maps throughout the décor.  One problem.   Do you guys know how difficult it is to find vintage or even moderately old maps where I live?!! I put multiple pleas out on Facebook, I searched any store I knew of...nothing. So, I decided I was going to have to use new maps whether I liked it or not. I didn't like it. :-/ There was no way it would look right. Next option, make new maps look old. But how? I grabbed an atlas and took to the internet to find out ways to age paper. There are several different ways, so I decided to try a few and see which one got the best results. Are you wondering the same thing?

The first method I tried was the wet coffee grounds method. I put two scoops of instant coffee in a plastic cup, added water and stirred it around until all the grounds were wet. Then, I spooned the coffee grounds onto the map and let it sit for a few minutes. I then had the totally fun (not) task of spooning up and wiping off all of the coffee grounds. This was by far the messiest method I tried.
I'll be honest, I'm pretty sure I did something wrong here. After wiping off all of the coffee grounds, the map came out looking like I had rubbed mud all over it. Not exactly the look I was going for. :-/
I think maybe I left the grounds on for too long and I definitely think that wiping the coffee grounds off was a bad idea,  that's what made it look like I had rubbed mud all over it, but I'm really not sure how else you would get them off. This is a method I may try again, just because I'm curious.

The next method I tried was another one using coffee. This time, I used a little bit of the coffee I had bought for my hubby at Sonic that morning (I was too lazy to actually make coffee... I took his coffee and did I mention, it was Father's Day? Sorry honey!) Anyways, I poured the coffee onto a 9x13 baking sheet, just enough to cover the bottom, and then I laid a map on top of it (it kind of floats). I spooned a little of the coffee onto the top of the map and then let it sit for about 10 minutes. Then I transferred it to a dry baking sheet and put it in the oven at 200 degrees for about 10 or 15 minutes.
Here is a picture of the map before...
This is a shot of the map during the process.
This is how the map looked afterwards.
Here is a side by side comparison of the way the map looked before (it's a different map, but it looks exactly the same) and how it looked after. You can see that the after (the one on top) is quite a bit darker and a bit wrinkled. It just looks older.
By the way, when you go to put it in the oven, make sure that there are not any puddles of coffee left on the map. If there are, you end up with a paper that looks like this... Not pretty.  Unless that's the look you're going for.  :)
 
The next method I tried is one I didn't see anywhere on the internet, that doesn't mean it's not out there though.  I thought, hmmm, I've got some tan craft paint and also some brown, why not try that.  I grabbed both colors, a cup of water and a small paintbrush. I barely dipped the brush in the tan paint, wiped off the excess and then dipped it in the water.  After that I painted it on the map and then took a paper towel and wiped the map to give it a worn effect.  I also crumpled the paper up some so that it would look even older, but this is not something you have to do.  Just a side note, I preferred the brown paint to the tan.  It was just a bit darker and I liked that.  It just depends on what your preference is. 
Here is a shot of the painted map.
Given the choice between these options, the painting method was definitely the easiest and quickest and since I usually go for whatever is easiest, I'm thinking that I'll probably use it to do my project for the baby shower.  I think that the one done with coffee in the baking sheet is a really good option too.  Hmmm, I might do that one instead.  Which one did you like best? Wondering what I'm going to use my aged maps for?  Stay tuned!  The Vintage Airplane/Travel Baby Shower is coming up soon!!!   
 
*Update- I went with the coffee in the baking sheet method, I just thought it looked a little bit more "vintage".
 

Friday, June 14, 2013

Boarding Pass Invitation

Hey everybody! So sorry that I've been MIA for a while! I'm working on a series of blog posts, so hopefully, that will change soon! No promises though! :) For today, I have a sneak peek at a baby shower that is coming up very soon. The theme is a Vintage Airplane/Travel kind of thing. I am super excited to show you all the details...just as soon as I get them all figured out! You see, when I first started planning for this theme, I had tons of ideas. But sometimes, I just hit a wall in my creative process. Does that ever happen to you? You run out of ideas, every idea you have seems to fall flat or the budget just doesn't allow for all the creative things you've dreamed up (this is usually what happens to me). I'd love to know how you deal with this. As for me, I tend to shut down for a while before bouncing back. That's the thing though, I always bounce back and usually, the event turns out better than I could have hoped. That's what I'm hoping for with this shower. I am starting to bounce back now and I am hoping that this shower will be one for the record books! We will soon see! :) In the meantime, I thought I'd give you a look at the Boarding Pass Invitation that I whipped up. It's supposed to resemble an airplane boarding pass. Let me know what you think! And if you have any tips for getting past that creative slump I was talking about, let me know! I'll be back soon!