Monday, May 27, 2013

Circle of Moms Top 25 Party Planning Moms of 2013


Hey guys and gals!  Just wanted to stop in and let you know that I entered the "Top 25 Party Planning Moms" contest over at Circle of Moms.  Of course, I don't expect to get 1st place since I'm just starting out, but it would be nice to get a couple of votes. :-)  Please take the time to click over and vote for me.  Right now, you can find me under the "pending approval" tab.  Just click on the link below to be taken to the website.  Thanks so much!
 
Circle of Moms- Top 25 Party Planning Moms of 2013 


Sunday, May 26, 2013

Saydee's Spa Party

Warning!!!  Reading this post may result in picture overload!!!  You have been warned.
Ok, I promise, I did not realize how many pictures I had planned for this post until I had finished editing them, but I just couldn't bring myself to cut any of them out. :-)
 
Alright, I'll get on with it already.  I am sooooo excited!  My coworker and friend Lacresa asked me to plan an 11th birthday party for her daughter, the beautiful Miss Saydee.
  Actually, Saydee and I pretty much had it planned before she ever talked her mom into it. :-)  Saydee knew I planned parties and we have discussed it off and on for a year now.  I have to say a HUGE thank you to Lacresa for allowing me to do it though.  Love that lady!
 
So, Saydee decided that she wanted a "Spa" themed party.  This was really fun for me to plan and I think she and her friends enjoyed being at the party as much as I enjoyed planning and executing it.
I asked my daughter Wylee and her friends Lilly and Mallory to help out with the make overs.  I also asked my friend Alecia and her girl Haven.  Huge thank you to all of these girls!  Without you, I couldn't have pulled this off!
 
 
Saydee knew she wanted pink and zebra print, so that's where I started.  I layered zebra print table runners over pink tablecloths, mixed zebra print plates with smaller pink ones and added some fun pink plastic "wine glasses" for the girls to drink out of.  Don't worry, they were filled with pink lemonade. :)
 
This was Saydee when she walked in and saw it all.  Do you think she liked it?
 
I covered the backs of the maroon chairs with white pillow slips and my daughter alternated tying zebra print ribbon and green tulle around them for me.


For the cake table, I used my trusty backdrop that I always use and just changed out the cover and added the birthday girl's name.  I found these great wooden letters already painted in the perfect color at Hobby Lobby.  Saydee got to take them home with her to hang on her wall.  I also hung some tissue poms and balloons around it and some lanterns from the ceiling.  I love the zebra print lanterns and will definitely be reusing them for other parties.

On the gift table, I put a jar of bath loofahs and a sign in banner.  The girls each got to take a loofah home and Saydee has a way to remember who was at her party.

 
I had several activities for the girls to do and I think they really enjoyed all of them.  I set them up at different tables and the girls went to one "station" at a time.
 
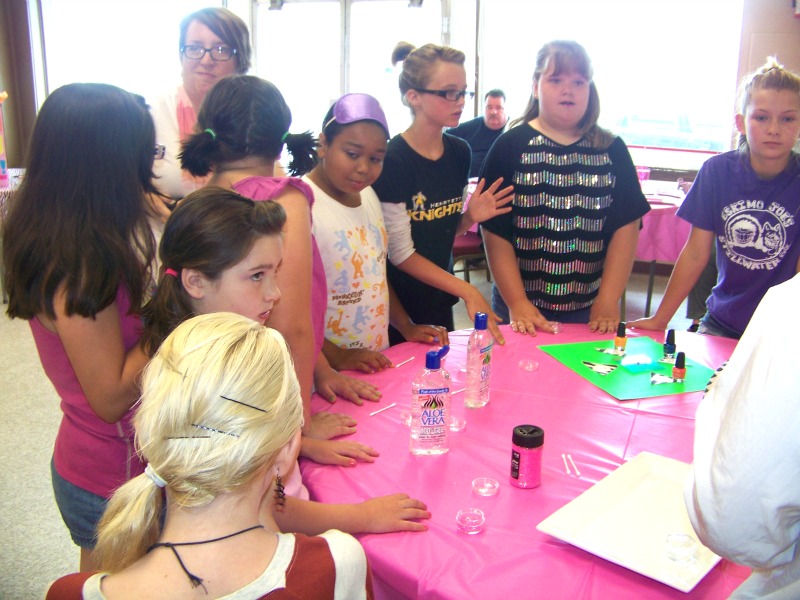
The first station was "Makeovers".  First, my daughter and her friends did the girls nails and while they were drying, they did the girls make up and hair.  I wish I had gotten some pictures of the girls hair, there were some really cute styles!


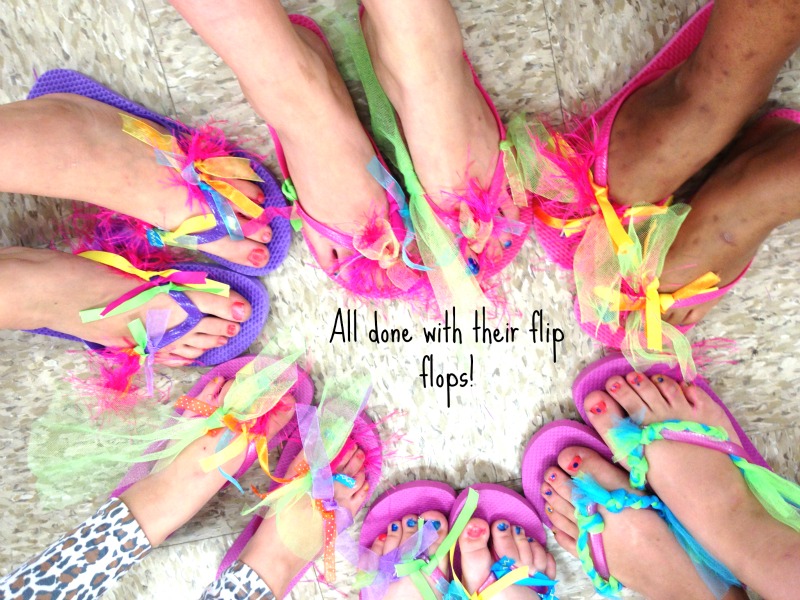
Next, we decorated our own flip flops.  They got so creative with this!


Then, we made our own body glitter.  The girls took these home as part of their party favors.  Please excuse the way I look in these pictures!  I tried to stay out of the shots as much as possible, but somehow I managed to get in a couple and the angles are awful!!! I do NOT look like this in real life...at least I hope I don't!


We also played this awesome game that I found on Pinterest.  It's kind of a nail polish version of spin the bottle.  You spin the arrow and do whatever it lands on.  The options were- Lose a Turn, Paint 2 Toes, Paint 3 Toes and Pick Your Favorite Color (1 toe).  There were different colors at each option, so the girls ended up with multicolored toes.  The first one to paint all ten toes was the winner.

 
I also set up a "photo booth" of sorts.  The girls had so much fun posing for this. They had giant sunglasses, feather boas and these cute leopard and zebra print hats to try on.  Keep an eye out for the littlest one, the camera definitely loves her. :)


The girls also played freeze dance and had a blast, but I didn't get pictures.  Before they left, we had a little extra time, so I let them try applying their own makeup.  It was... interesting. :)
 
I snapped a quick pic of the birthday girl after she had done hers.  Still beautiful!

 
I really think they all enjoyed themselves.  I know I did!
 
I hope you all enjoyed reading this post, even if it was a little picture heavy.  Please leave me a comment and let me know what you think!  By the way, I am sorry I haven't been posting more often.  I'm really hoping to do better now that summer is here and I'm not working.  I hope you'll keep reading!  Thanks guys!

Saturday, May 11, 2013

DIY Chalkboard Bunting

Hey there! I wanted to pop in and show you guys this little project I did the other day. A teacher friend of mine asked me to set up her room for her "Muffins with Mom" Mother's Day get together. I didn't really get any pictures of the room, but I did get some pictures of something I made for the backdrop. A chalkboard bunting! I have been wanting to make one and I decided that this was the perfect excuse.
 
I'm just going to jump right into the tutorial.  I haven't done a whole lot of tutorials, so I'm definitely open to pointers if you have any!  Just leave me a comment! 
 
Ok, so I started with these chipboard bunting flags that I found at Hobby Lobby.  They came 9 to a package and I got them on sale for around $3.50 a package.
 
 
Next, I grabbed some chalkboard spray paint and followed the directions (shocking, I know) to cover each flag with the paint.  So here's where I tell you my little secret.  The can said to wait 24 hours for the paint to dry completely... Ummm, I am just not that patient.  I think I might have waited 12 hours...maybe.  Guess what?  I don't think it made a bit of difference.  I had no problems with the paint.  So, here are the flags after the 2 coats of paint.  Sorry they don't show up very well.  I was painting them on a trash bag. :-/
 
After waiting as long as I could for them to dry, I seasoned them with a piece of chalk.  To season them, you simply take a piece of chalk and rub the side of it all over the flags until each one is pretty much covered with chalk.
 
Next, I just took a dry washcloth and rubbed off most of the chalk.  I left a little on the flags because I liked the way it made them look.  They looked more "used", not brand new.
 
Luckily, these flags came with prepunched holes already in them, so all I had to do was string twine through them.  You could really use anything for this. Ribbon, fishing line or even tulle would work.  I used the twine because I plan on reusing this bunting over and over again and I felt like the twine would go with just about any theme.
 
After that, it was just a matter of writing my message on it and then hanging it on the backdrop I had created.

 
So there you have it.  A super simple diy chalkboard bunting.  I have a feeling I'll be using this for lots of different things.  When I went to erase the message, it came right off, no problem!  So, what do you think?  Will you be making one of your own soon?  What will you use it for?  Any tweaks you might make?  Leave me a comment and let me know!
 
Thanks for reading!
 

Tuesday, May 7, 2013

Jungle Theme Baby Shower

Hey there everybody! Sorry it has been so long since I last posted! Baseball season has started up for my son and it keeps us pretty busy. I do have a few pictures to show you of the jungle theme baby shower I did the other day. I'm sorry to say, I still haven't learned how to take decent pictures and my daughter was at school, so she was unable to take them for me. The fact that the party was held in the school library didn't really help matters either. :) Needless to say, these are not the best pictures, but hopefully, you'll get the general idea. I did get lots of compliments on the decor, I even had a couple of people tell me that I should start a business (I'm trying!). I always wonder if people are just being nice because they know how much I like doing it or if they're being sincere. Does anybody else have that little insecurity? ;) Anyways, enough about me, on to the party!

This is the main table. I went with a very natural color scheme, browns, greens and animal prints. I used plain kraft paper to cover the backdrop and draped some vines around the edges. You can't see it very well, but I made the giraffe print bunting that said "Welcome to the Jungle". I used moss balls and what I'm going to call ummm, wicker balls? My mind is totally fried! I can't think of the name for these little balls, but I love the texture they added! I used a burlap runner for more texture.

Here is another view. I made some green punch to add a little more color and to coordinate with the cake. I also hung leopard print lanterns above the table. I loved being able to mix animal prints!

Of course, I alternated green and brown plates and green napkins with brown zebra print napkins. I don't know if you can see it, but I bought this great wooden "thing" at a craft show and it is the perfect silverware caddy! Not sure if that's what it was made for, but it works. :-)
 
 
Here's a shot of the cake and a better look at the bunting. Wish I would've  taken that silver thing out from under the cake, but, oh well.
 
 
This is a table I set up for people to sit at. I started with strips of burlap that I used as a runner and added vines, wicker ball thingies :), and these cute little wooden animals that I got at Hobby Lobby for next to nothing.

 
This was a sign I sat on the gift table reminding people to fill out a Wishes for Baby card and take a favor. The favors were probably my favorite part. I wrapped little candles in tulle and added a poem I found on Pinterest. It said, "Here is a candle for you to light, once baby Braxton has arrived. With the flicker of the flame, say a prayer in baby's name." 

 
I didn't really get a picture of the gifts that we gave the mommy to be, but you can kind of see them in the bottom corner here. I put together a Hospital Survival Kit, Bath Time in a Jar and a Diaper Quick Change Kit, all found on Pinterest, of course. :-)
 
 
So, there you have it! Sorry for the crummy pictures! I promise, I am working on getting somebody else to take pictures of the parties I do! Anyways, hope you guys liked it! Remember, if you haven't followed me on Facebook yet, be sure to click on the link up at the top and follow, follow, follow!
Thanks for reading!

Tuesday, April 9, 2013

Jungle Themed Baby Shower Sneak Peek!

Hey everybody! I just wanted to drop in and show you what I'm working on. I am so excited to be planning a Jungle Theme Baby Shower for a girl I work with! The shower isn't for another couple of weeks, but I thought I would give you a little sneak peek when I can. Today, I'm starting with the invitations and Wishes for Baby. I hope you like them!

This is the invitation I created using Microsoft Publisher. I am addicted to Publisher! It is so easy to use and for me, that's the most important thing.


I also created these "Wishes for Baby" cards. I made two different ones, just for fun. I used the same graphics on these that I used on the invites. I got the clip art from Clker.com. It's a great place to find free clip art.


So, there is your sneak peek for today. I'll try to post another one soon. Hope you like it! If you have any great ideas for a jungle theme baby shower, leave them in the comments below!

See you soon!

Monday, April 1, 2013

Bow Ties or Bows, Soon We Will Know!

Hey everybody! This weekend I had the pleasure of hosting a Gender Reveal Party for my sister Harlibeth and her husband Derrick. It was so much fun! I think it was a fairly new concept for most of the people that attended, but they all seemed to enjoy themselves, so I'm considering it a success. Unfortunately, I didn't end up with a lot of good pictures this time and I'm really disappointed about that, but, what can you do? I'll show you what I have. :)

The theme was "Bow Ties or Bows, Soon We Will Know!" My hubby helped me make this chalkboard for another party I did and I decided to use it for this one when the backdrop I had made, ummm well, let's just say it kind of fell apart. Just keepin' it real here, I am not perfect! Sometimes my ideas just don't work the way I want them to. :) Anyways, see the tulle pom poms on the sides? I'm thinking there's a tutorial coming up soon on those! They were so easy to make and the are sooo cute! I also made a bow and bow tie garland to hang at the top of the chalkboard. I framed an ultrasound picture and added it to the backdrop as well.


I love these letters I found at Joann's. I just painted them white and added bow ties and bows to them. I'm hoping that since I painted them white, I'll be able to pull off the bows and reuses the letters.


For the table settings I had pink plates and alternated between solid blue napkins and blue ones with white polka dots. I added pink forks and we drink from mason jars. I found the blue striped straws at Michael's for a dollar per package! Score!!! I also had the chevron table runners made and I plan on reusing them for other parties.


We had sandwiches, chips and blue and pink juice. I cut some white lunch bags with scalloped scissors and added bows and bow ties to them.


This was probably my favorite part! I printed out a paper for each letter of the alphabet and asked everyone to draw and color a picture to go with the letter they chose. At the end, we put it together to make Baby's First ABC Book! Everyone had so much fun with this and Harlibeth loved it!


I kept the kids table really simple, just these little packages with crayons, a coloring book and stickers. This is definitely something I would change next time! It didn't keep the kids occupied for very long and let's just say I used a lot of stain remover getting crayon out of the tablecloths. Definitely gonna rethink the kids table!


The cake.


Team Pink.


Team Blue (plus one little girl in pink who just wanted to be by her daddy.:) Don't ask me why the big goofball in the middle (my brother) wore a red shirt. He's an attention hog. ;)


And for the win.....


Team Blue!!!! Introducing Judah Knight Frye!!!


I am so happy for Harlibeth and Derrick and I can't wait to meet my newest nephew! Now it's time to start planning the baby shower!!!